
Noise Distortion

Distort contours by introducing a random noise pattern. Control the size of the distortion through input parameters.
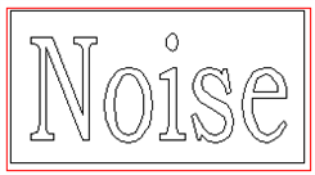
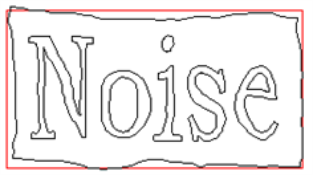
The images below show a set of contours before and after introducing noise distortion
The distort tool can modify contours or reliefs. Distorting a relief creates a different effect than creating a relief from a distorted contour as illustrated below.
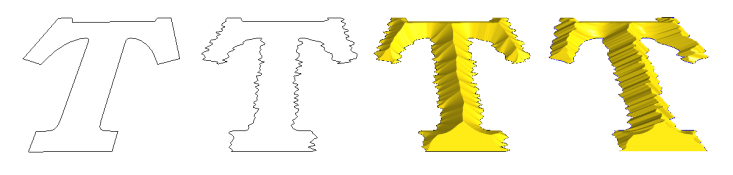
The far left contour is the original, and the right contour has been distorted. The left relief was created by applying a beveled relief to the distorted contour. The right relief was created by applying a beveled relief to the base contour and then adding noise distortion.
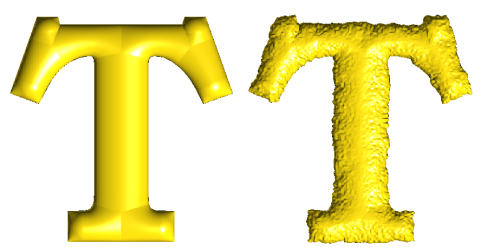
Another example shows how the original relief on the left can be modified with a subtle texture to create a unique surface.
Method 1
![]()
Define parameters that control the size and position of the noise.
| Wavelength | Define the length along the contour over which the noise is applied along the contour. Longer values spread the distortion over longer distances. |
| Jitter | Define the strength of the distortion. Small values cause subtle distortions, larger values exaggerate the distortion. |
| Horizontal Amplitude | The distance the contour is distorted in the horizontal (X-Y) plane |
| Vertical Amplitude | The distance the contour is distorted in the Z axis. To keep contours flat vertically, set this value to 0. |
Method 2
![]()
Method 2 provides more parameters than Method 1 and allows the noise to be controlled in each direction individually. There are two parameters, Size and Power, and there are two instances of each parameter. The contour is distorted in two passes, and each set of parameters controls one of the distortion passes.
| Size | Define the size of the distortion in the X, Y, and Z direction. Distortion can be limited in any direction by setting the value to 0 |
| Power | Define the strength of the distortion in each direction. Small values create subtle distortions, larger values create more exaggerated distortions. |